Sew In Brighton Blog

 RSS Feed

  1. Phillipa tells us about the dress she created for her daughter Martha that made her this months Sewing Star, and won her a FREE Stitch Class. To find out how you could become our March Sewing Star please click here.

    Phillipa was inspired to make this dress because she has a 6 month old baby, Martha, and wanted to learn to make childrens clothes.
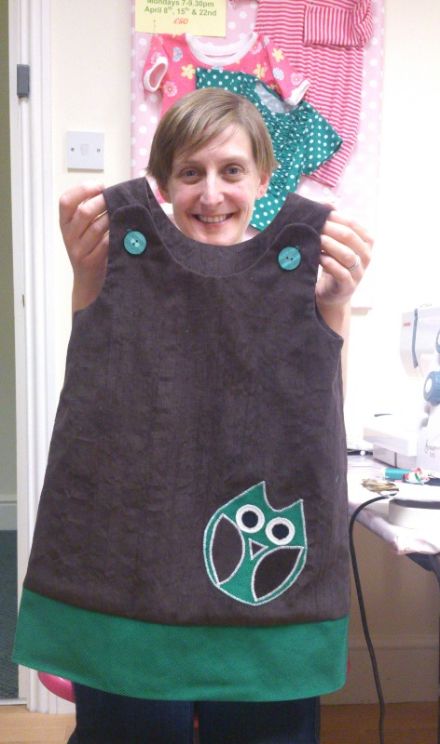
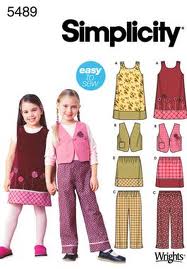
    phillipas dress for martha march 2013 mcfp course        simplicity 5489 image 

    She came on the Making Clothes from Patterns Course at Sew In Brighton armed with Simplicity's 5489 pattern and 2 lengths of corduroy, which she'd bought on the pre-course shopping trip at Fabric Land, which is run as part of the course.

    Phillipa says of the course:
    "The best things I learnt were how to do applique and automatic buttonholes - and I also learnt loads from watching the others on the course learning various techniques for their garments, such as the zip in Sallys top, gathering on Fran's 50's style dress, I plan to try both techniques myself in next projects!
    " The classes were really good, informal, which I prefer. There was always a good atmosphere and liked the balance between Kat's teaching and allowing me to get on with it myself and ask for help when needed."
     
    Phillipa made the dress as a practise run, as it's a 3 year old size, and she plans to now make lots more from the same pattern in smaller sizes that Martha can wear now - next the next one will have an applique apple instead of an owl!
     
    If you'd like to make clothes from patterns, you can do so on these courses and classes:
     
    Making Clothes from Patterns  5 week evening courses
    We take you pattern /fabric shopping, then teach you how to make clothes from commercial dressmaking patterns, fit them to your size and sew up to an expert finish! 
    Click here for more info or to book
     
    Stitch Evenings Thursdays 7-9.30pm every week
    Make whatever you want! Flexible sewing and dressmaking classes: choose your own dates and sewing projects.....Improve your sewing skills & get expert tuition making clothes from commercial sewing patterns or mending and altering clothes, furnishings etc. 
    Click here for more info or to book

     
    Stitch Mornings  
    Tuesdays and/or Thursdays 10am-12.30pm every week
    Make whatever you want! Flexible sewing and dressmaking classes: choose your own days, dates and sewing projects.....Improve your sewing skills & get expert tuition making clothes from commercial sewing patterns or mending and altering clothes, furnishings etc. 
    Click here for more info or to book

    Stitch Weekends  
    Sun afternoons 2.30 - 5.30pm every week
    Make whatever you want! Choose your days and what to sew. Improve your sewing skills & get expert tuition making clothes from commercial sewing patterns or mending and altering clothes, furnishings etc.
    Click here for more info or to book

    One to one - private sewing & pattern cutting lessons
    Flexible: choose your own dates and projects
    Get our undivided attention to help you with any sewing or pattern cutting project from learning to use a sewing machine, to soft furnishings to altering/creating dressmaking patterns to fit 'non standard' body shapes, or anything else!  Click here for more info or to book
     
  2. Claire tells us about the dress she created that made her this months Sewing Star, and won her a FREE Stitch Class. To find out how you could become our March Sewing Star please click here.

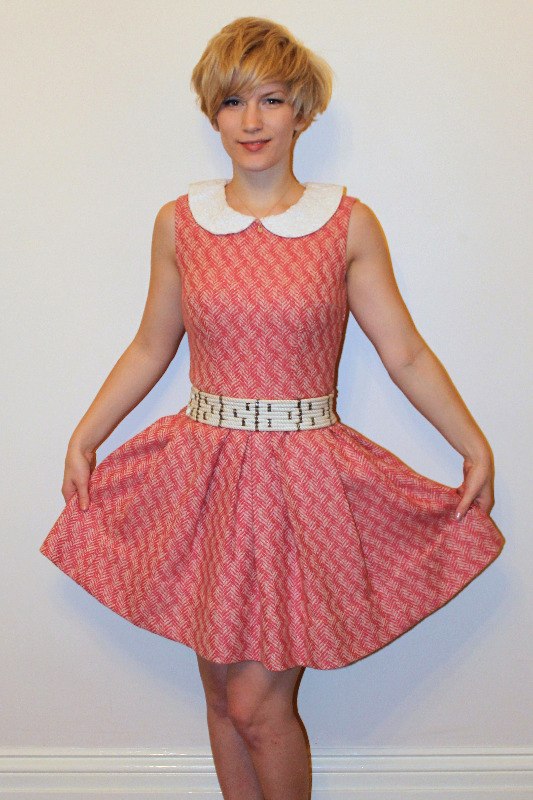
    claire 1

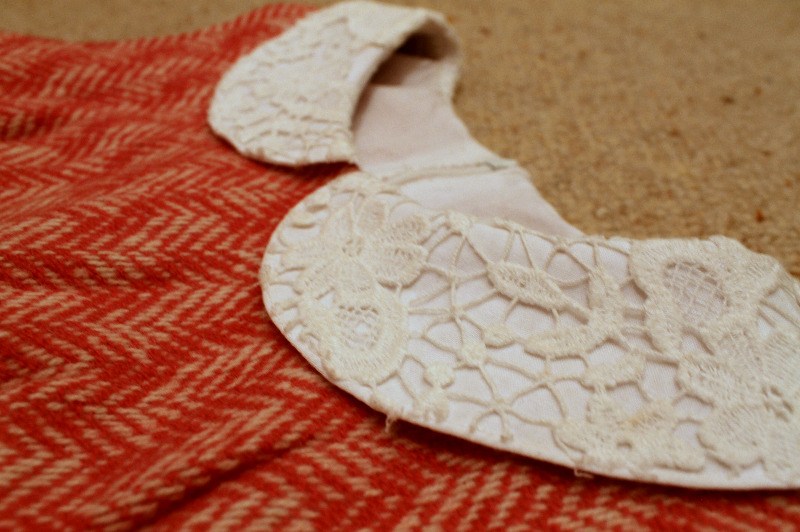
    I'd just finished reading Chanel's biography, which was littered with plenty of drawings of her classic designs, tweed jackets and plenty of structure. I suppose this was the inspiration behind choosing my heavy pink and cream fabric. It made the most beautiful box-pleats, with lots of oomph to the skirt! I wanted to keep the dress feminine though, almost doll-like, so nipped the bodice in of the 50s-style pattern, added a lace Peter Pan collar and shortened the hem-line. I love the end result! 

    I made it in Stitch Evenings on Thursday nights. I’d go straight from work, and if I was lucky, I’d have just enough time to grab a mocha before class!

    collar

    The evening classes are a great opportunity to do something productive on a weeknight, rather than veg out in front of iPlayer. One-to-one help is never far away, as well as a good chat with everyone there. I also appreciate the HUGE selection of herbal teas (and chocolate chip cookies) on offer to help me get through the evening. Cinnamon and Liquorice tea is a revelation! 

    I've already worn my dress for client drinks followed by a Yoga party (no actual yoga at this, but plenty of raw food and vodka!). It's lovely and warm, due to the thick fabric and cotton lining, so I'm storing it away for future winter parties.

  3. Charlotte tells us about the inspiration behind the corset she made during Stitch Mornings

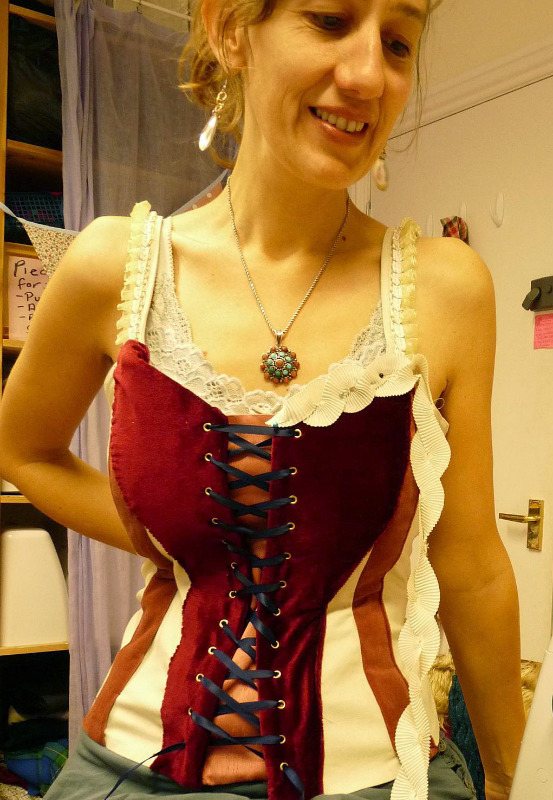
    charlottes corset cropped

    What inspired me to make the corset is that I love period costume...and, imagining that I come from other times or have lived other lives. I had actually had a dream where I was wearing a corset and long full skirt and big petticoat, so I tried to remember the details and draw the outfit. I began by making a gorgeous ruffled skirt.

    When I came to making the corset part of the outfit I went online and looked at fashion designers ideas for inspiration and, watched the series Paradise which has beautiful 1890s clothes in it. I was inspired to use rich velvets reds and pinks.

    I had an excellent teacher at the Sewing Lounge who encouraged me to try out different ideas shapes and forms to create what I had imagined. I learnt how to adjust and adapt a pattern to create the shape I wanted. I used the overlocking machine for inside seams and the eyelet machine to create a lace-up front.

    I intend to wear my corset over a cream silk blouse so that I can wear it as day or evening wear. Definitely to houseboat parties where I normally wear ball gowns anyway :-).

    I’m very pleased with the result as it turned out just how I imagined and I really love it.

    To find out more about Stitch Mornings which are held weekly on Tuesday and Thursday mornings 10.00 - 12.30, please click here.


  4. Get that perfect retro-style fit! We're excited that we're going to be at the upcoming Vintage Fair at Brighton Dome on Sunday 4th November, 12 to 5pm. There will be a great range of stalls selling really lovely vintage frocks, ladies' day wear and evening wear, and also suits and shirts for the gents.  So if you find something you love but it doesn't quite fit... we'll be on hand to advise you how you could alter it, for Vintage perfection  ....OR even better, you could think about bringing it to one of our popular Stitch sessions so that you can alter it with our expert help.  - see Stitch mornings, Evenings and Weekends in the 'all classes' menu.

    See http://www.thevintagefair.com/#/brighton/4557305739  for more about the Fair.


  5. Emily took our 'Pattern Drafting Course' and went from learning how to make a block, to creating a unique and perfectly fitted skirt of her own! Here's how she got on...

    Pattern Drafting (Cutting) Course student blog
    A friend of mine had recently completed a pattern cutting course. “Look,” he said, showing off a newly made waistcoat, “Look how well it fits!” It indeed did fit well and I was sold, I decided that I was going to have a go too.
    I found a course (advertised in the window of Fabric Land), booked it up and best of all, my parents paid for it as my Christmas present.
    The first evening began with introductions. “Hello, my name’s Emily and it’s been one day since my last sewing session.” Nods and smiles all round and slowly we all got to know each other’s names. Then it was on to the course for real. With lots of measuring, drawing, checking and re-measuring, we all began to draft our pencil skirt blocks.

    This is my block -

    Emily Blog1

    From these, we created our patterns. After hours of careful, close work, attention to detail and ultimate concentration I unpinned my pattern pieces from the calico to see… some square bits of fabric with slightly rounded corners.
    Never in the history of humankind has so much work gone into creating some square bits of fabric with slightly rounded corners BUT I knew, they were my square bits of fabric and the slightly rounded corners would fit me perfectly when I made up the toile (fingers crossed).
    It’s actually quite hard to sew when you’ve got your fingers crossed but anyway, I did make my toile and it did fit. Yes! What a great sense of satisfaction.

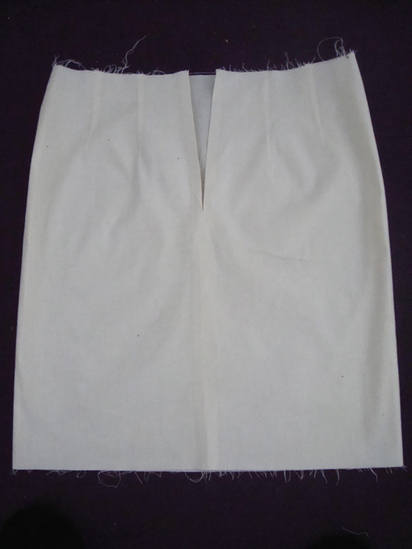
    Back view of my toile -

    Emily Blog 2

    Over the next few weeks, there followed a great deal of guidance and teaching from Kat about how to achieve different styles and fits, including how to: reposition darts, add volume, inverted pleats, waistbands, facings, splits, wrap skirts, asymmetric designs, ruching, gathering and ruffles. We’d got to the stage where we were ready to start designing our own patterns. I was wavering between two designs that I’d seen and wanted to emulate.

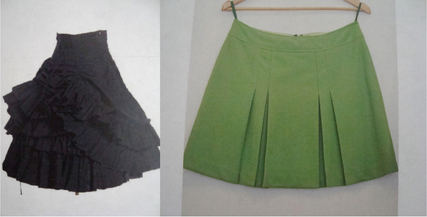
    Two skirts I liked -

    Emily Skirts

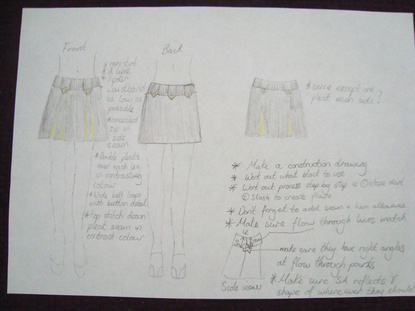
    In the end I went for the green skirt design. I have always loved 1960s clothes and liked the retro feel of the mini skirt. It reminded me of the skirts my Mum used to make for me when I was a teenager, so from here I drew up some designs.

    Designs for my skirt -

    Emily Blog 5

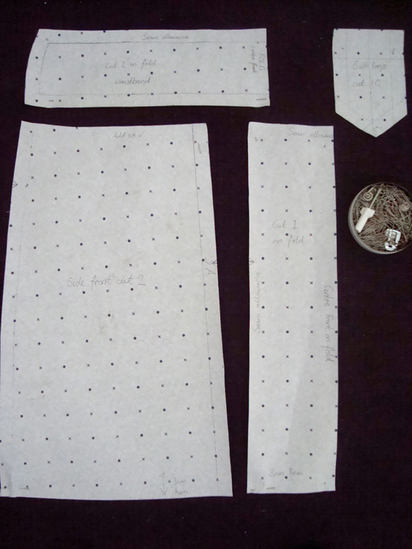
    I have some fab yellow 1960s shoes and they inspired me with the colour choices. I was all set – original pattern here I come. I was a bit gung-ho and forgot to make a plan, I just started drafting pattern pieces at will, I thought I was keeping track of what needed a seam allowance and what didn’t…

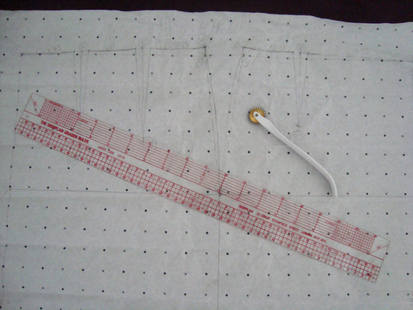
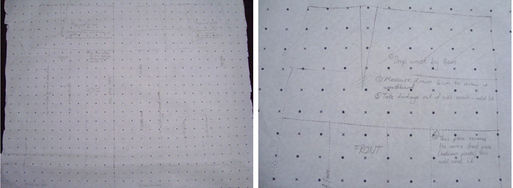
    Some of my patterns on the curiously named 'spot cross' paper -

    Emily Blog 6

    When it came to making up my garment, I clearly hadn’t kept track of where seam allowance had been added and the skirt tuned out way too big!

    This is the plan I made after I’d made the skirt! I’ll know better next time -

    Emily Patterns

    Still, all was not lost, as Kat had shown us what to do when this happened and I corrected my sizing in order to produce a skirt that fitted just right.

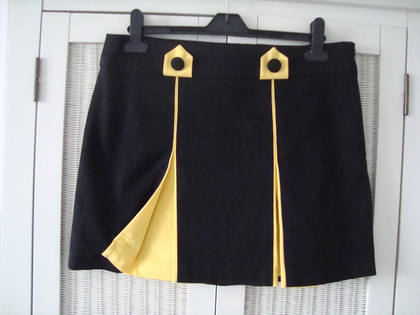
    My final skirt! -

    Emily Blog 9

    So, my final thoughts - I loved the course. It gave me a great sense of achievement and satisfaction. Funnily enough, it’s made me appreciate commercial patterns a lot better, which will be really helpful with dressmaking classes and making my own stuff at home.

    I feel inspired and equipped to continue some more skirt patterns on my own and I’m ready for the next challenge, maybe dress patterns or even jackets. Thank you sew much (I couldn’t resist one sewing-based pun).

    If you'd like to follow in Emily's footsteps and create an original garment of your own you can find details of our next Pattern Drafting Course here.


  6. Ever had trouble matching pieces when making up a garment from a bought pattern (Simplicity, Burda etc)? On my Making Clothes from Patterns course last night we were having a right old time working out which was the side seam, which was the back etc once the pieces were cut out - which made matching the right pieces together slow & frustrating. Once you've cut out the pieces there's often no indication on the cut fabric pieces as to the right way up or round to put things together. Taking a tip from the way we make patterns on the Pattern Cutting course I suggest adding extra notches to your patterns before you pin them to your fabric.

    But what are notches? Have you noticed little black triangles on the edges of pattern pieces? They're notches & they help you match pieces together, like a jigsaw puzzle e.g. a back sleeve head has 2 notches on the edge that correspond with 2 notches in the same place on the armhole. You cut them as tiny half-cm-deep snips at a right angle to the cloth (don't cut out the whole triangle, it'll fray!). I often find there aren't enough notches to help you match up effortlessly when sewing though, so I suggest, when making clothes from patterns that you add more of your own:

    1. Cut out the paper pattern pieces to your size as usual.

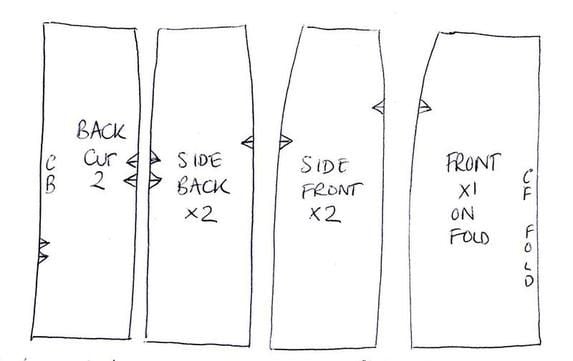
    2. Before you pin them to the cloth, look at the illustration below to see where I've drawn extra notches on the paper pattern pieces (the triangle shapes on the edges). Lay the pattern pieces together as you would when you sew and draw little notches on both pieces: for example half way down the side seam on the front and back piece, and 2 notches two thirds of the way down on the centre back, so there's no way you can sew a side to a back, as the notches won't match up. Put even more notches if your garment is cut on the bias as it will help you match up when the fabric stretches.

    Adding notches is even more important if like my student Heather's skirt below you have 3 panels in the front and 4 in the back. We added extra notches so it was a bit like a jigsaw puzzle, with each seam having a different notch position from the next seam - then we  just couldn't fit the wrong pieces together!

    resized notch tastic