How I made my own dress from just a picture. Jacqui Rush - Student Blogger Series
Posted on
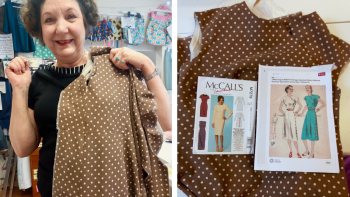
I wanted to recreate the style of the dress in the picture on the right but wasn't sure where to start. I've done a bit of sewing before in the past but that was many years ago and I wanted to do something creative again. I love the 1940's style and it's hard to find vintage garments in my size, so making my own clothes was the perfect solution!
I started my project in January 2018. I came to the first lesson with Kat in Sew In Brighton's Stitch! General Sewing & Clothes Making Classes in Hove. These are on several times a week so I could fit them round my personal schedule. I arrived with with just:
- a picture of what I wanted to make - a 1940s style day dress. It had a side button detail (that you see in the illustration above on the right). I'd printed it from Pinterest
- some calico
- and lots of trepidation! However I was made very welcome and first day nerves were soon dissipated in the friendly, cosy atmosphere of the Sewing Lounge.
First of all we chose a McCall's M7279 basic fitted dress pattern from the stock patterns they have in the classroom, to make a 'block' (basic template pattern with no detail) that fits perfectly to my shape. The brilliant idea is that once tweaked to fit me I could then go on to use this perfected pattern block again and again as a basic template for creating all sorts of beautiful 1940's dress designs (and even skirts and tops from just using parts of it) that I come across.
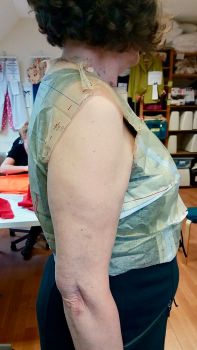
We 'sculpted' this pattern in the tissue paper to my figure by 'tissue-fitting' it to my body. This involved pinning the pattern pieces together as they would be sewn - marking and pinning on the sewing line, which was 1.5cm in from the edges on most seam, and 2.5cm in on the sides and waist. I tried it on (it's only half a pattern at this stage) and we adjusted it in paper before going anywhere near the fabric! I'd never come across this method before but it seems to be an excellent way to get the fit as close as possible without wasting time and fabric sewing something that may not fit well at first.
Next it was time to pin my perfected pattern onto cotton calico fabric and cut out the main pieces (no facings at this stage as this is just for the fit). I even picked up loads of tips on how to pin professionally! These teachers know their stuff after years in the fashion and manufacturing industries. No random pinning here : )
This stage of cutting out and sewing the pattern in calico was about making a 'toile', a mock up to check and further adjust/perfect the pattern on me. I sewed the calico pieces together with a large stitch (size 4 - easy to unpick and adjust!) to enable us to check and fine-tune the fit. Teachers Kat & Jo pinned out any further adjustments on the toile once I popped it on. They showed me how to mark these changes back to the pattern to create my 'block'. Although it's technically dressmaking, this stage process has so many elements of pattern cutting - so even just making a garment from a pattern to wear as is would be a great intro to pattern cutting
Now, block completed, it was the actual pattern cutting and fashion design stage of the process:
I traced round the block onto fresh 'spot and cross pattern paper'. I was shown how to draw in the new style lines for my 1940's dress onto this traced block pattern. These were left there to keep a record of the 'plan', and I traced off each of these new shape pattern sections onto more fresh paper to create a completely new pattern with the same perfect fit of the first dress.
I had my hand held every step of the way by Kat and Jo during my sewing and clothes making classes and I really noticed my confidence and knowledge grew week by week.
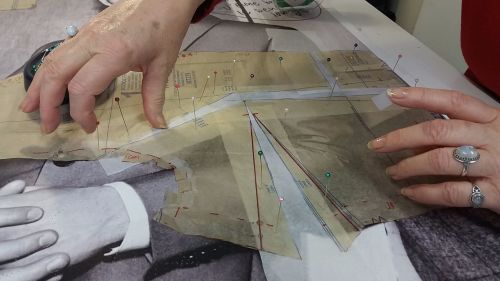
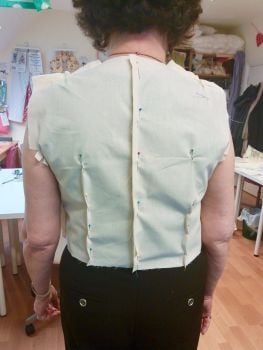
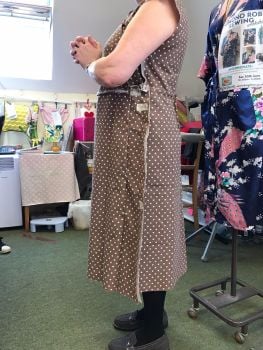
The whole process took 21 of these all-project sewing classes to complete ( I came once or twice a week, the classes are 2.5hrs long). I now have:
- a wonderful dress that I've already worn a lot
- a beautifully fitted basic block dress pattern which I can't wait to convert into some more 1940's style tops, skirts & dresses by tracing off sections as I did on the first dress.
- a whole range of new skills and the confidence to use them to make more lovely clothes from my block
I loved the classes, they are sociable and fun whilst keeping all students very productive - a winning combination! The classes are also very small & relaxed with just 5 people, all making different things. During my sewing sessions I met people sewing curtains, cushions, yoga bag, children’s waistcoats, a gentleman making a Christmas shirt, two teenagers with Mum sewing their own pyjamas, skirts and pyjama shorts. Really inspiring to see others completing their projects or learning to sew for the first time
In retrospect my project was very ambitious and at times, a little slow and frustrating because of all the fitting and tracing off which I had never done before! But with the expert guidance and encouragement from the teachers, I gradually learned many new skills.
Ultimately I was thrilled to produce a beautiful tailor-made 1940s style dress, exactly as I had envisaged.
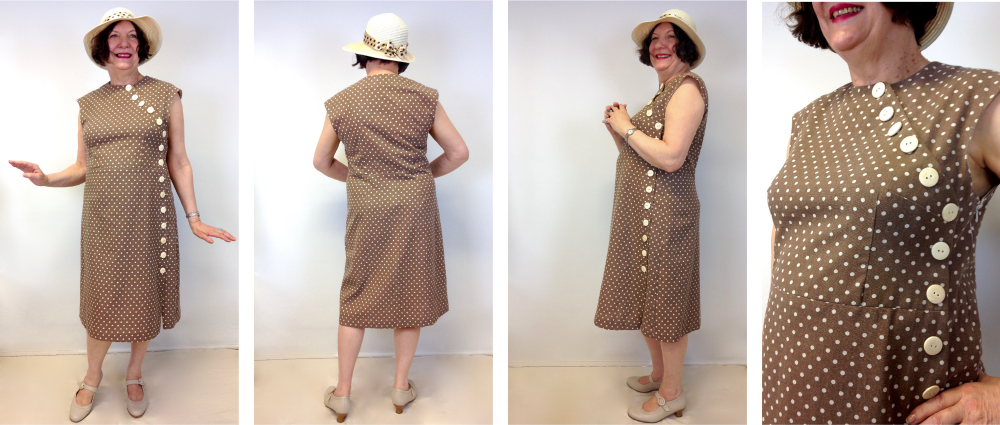
The skills learnt:
- Taking a McCalls basic ‘block’ modern dress pattern and re-creating it into a 1940s style day dress.
- How to cut out the tissue pattern and fit it to my exact measurements. This involved drawing in the sewing line, pinning the paper together and actually trying on the paper pattern and adjusting it to my figure, including doing what's known as a 'full bust adjustment'.
- How to use the newly fitted tissue pattern to cut out and make a perfectly fitting trial garment known as a ‘toile' in calico fabric.
- How to re-design the dress shape to the 1940s style - using sticky coloured tape on the toile to mark out the new shape of the neckline. Also re-shaping the skirt line.
- How to transfer the newly styled tissue pattern on to spot and cross paper, including adding facings for the new asymmetric neck shape.
- Laying out the spot and cross pattern on to the fabric and cutting out the dress pieces.
- Ironing interfacing on to the facing for the neck and collar, adding to the garment and under-stitching.
- Using an overlocking machine to give the fabric edges a professional neat finish before sewing the garment together.
- Sewing in an invisible zip with the special zipper foot.
- Finally, how to be patient and learn to take one step at a time...
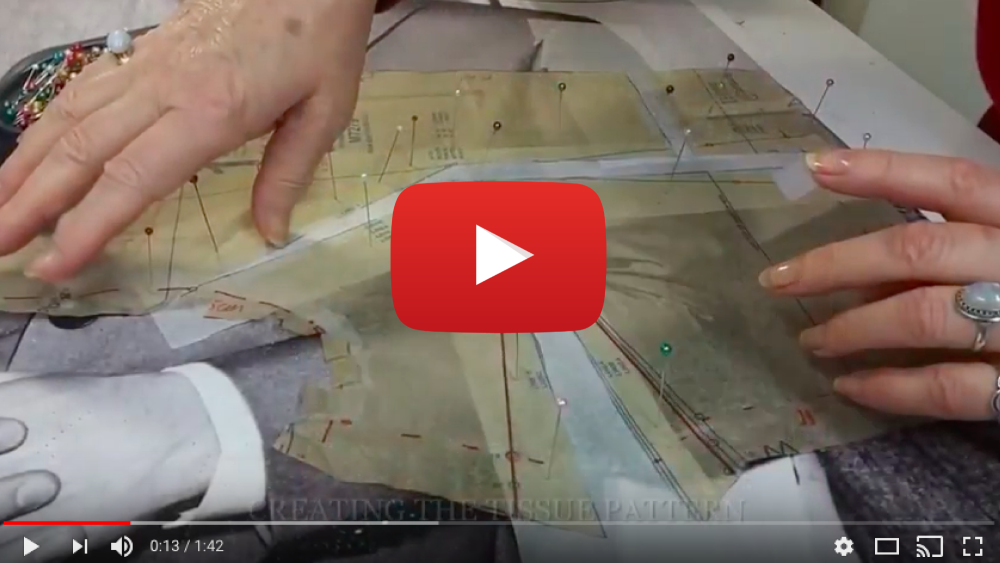
Click the image below to view the video of Jacqui's dress making process here:
